Toothpaste Manufacturing Process: From Formula to Finished Product
When you’re sourcing a toothpaste manufacturer, understanding how toothpaste is actually made gives you a massive advantage. You’ll ask better questions, spot red flags faster, and know exactly what quality looks like at every stage.
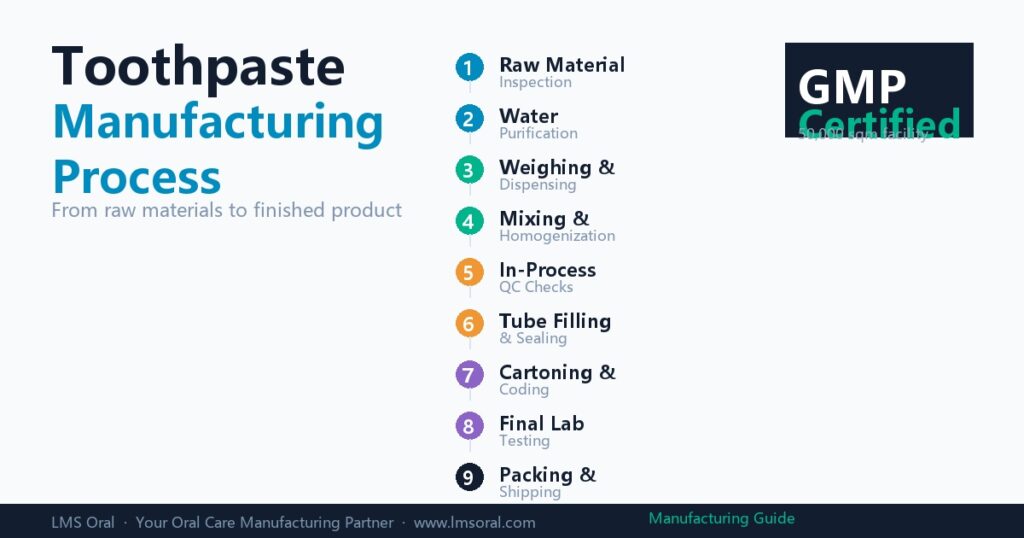
Here’s the complete manufacturing process, broken down step by step.
Step 1: Raw Material Sourcing & Inspection
Everything starts with ingredients. A serious manufacturer maintains a vetted supplier network and tests every batch that arrives.
| Ingredient Category | Examples | Function |
|---|---|---|
| Abrasives | Hydrated silica, calcium carbonate, dicalcium phosphate | Cleaning and stain removal |
| Humectants | Sorbitol, glycerin, propylene glycol | Prevents drying out, maintains texture |
| Binders/Thickeners | Xanthan gum, carboxymethyl cellulose, carrageenan | Creates smooth, stable paste consistency |
| Surfactants | Sodium lauryl sulfate (SLS), sodium cocoyl glutamate | Foaming and dispersion |
| Active Ingredients | Fluoride (sodium fluoride, stannous fluoride), nano-hydroxyapatite, potassium nitrate | Cavity protection, whitening, sensitivity relief |
| Flavors & Sweeteners | Peppermint oil, spearmint oil, xylitol, stevia, menthol | Taste and freshness |
| Preservatives | Sodium benzoate, potassium sorbate, parabens (declining) | Microbial stability |
| Specialty Additives | Charcoal powder, probiotics, enzymes, pearl powder, miswak extract | Differentiation and marketing claims |
What to verify: Ask for the Certificate of Analysis (COA) for key raw materials. A factory that cannot produce COAs is cutting corners.
Step 2: Water Purification
Water makes up 20–40% of toothpaste. Impurities in water affect taste, stability, and microbial safety. Professional manufacturers use:
- Reverse Osmosis (RO) to remove dissolved solids, minerals, and contaminants
- UV sterilization to eliminate microorganisms
- Deionization for ultra-pure water in premium formulations
The purified water is held in stainless steel tanks and tested before entering production.
Step 3: Weighing & Dispensing
Every ingredient is precisely weighed according to the Master Batch Record — the controlled document that defines the exact formula.
This happens in a dedicated weighing room with:
- Calibrated digital scales (verified daily)
- Barcode scanning to prevent ingredient mix-ups
- Double-sign-off: operator weighs, supervisor verifies
- Dust extraction for powder handling
Precision matters: A 0.5% error in fluoride concentration can mean the difference between effective cavity protection and regulatory non-compliance.
Step 4: Mixing & Homogenization
This is where the magic happens — and where factory quality most visibly diverges.
Phase 1: Liquid Phase Preparation
Humectants (sorbitol, glycerin) are combined with purified water in a jacketed mixing vessel. Binders and thickeners are slowly dispersed while heating to 50–60°C (122–140°F) to ensure complete hydration without clumping.
Phase 2: Powder Addition
Abrasives, active ingredients (fluoride, hydroxyapatite), and specialty powders are added under high-shear mixing. The order of addition matters: abrasives go in before actives to ensure even distribution.
Phase 3: Vacuum Deaeration
The mixture is placed under vacuum (typically -0.08 to -0.095 MPa). This removes entrapped air bubbles that would cause:
- Tube collapse during filling
- Inconsistent texture in the final product
- Accelerated oxidation of sensitive ingredients
Phase 4: Flavor & Surfactant Addition
Flavors and surfactants are added last, after the batch has cooled below 40°C (104°F). Adding them too early degrades volatile flavor compounds and can cause excessive foaming.
The entire mixing cycle takes 2–4 hours depending on batch size and formula complexity.
Key equipment to look for:
- Vacuum homogenizing mixer (not a basic paddle mixer)
- Jacketed vessel with precise temperature control
- In-line viscosity monitoring
Step 5: In-Process Quality Checks
Before filling begins, the batch is sampled and tested:
| Test | Target | Why It Matters |
|---|---|---|
| pH | 5.5–10.5 (varies by formula) | Too acidic = enamel erosion; too alkaline = irritation |
| Viscosity | Formula-specific range | Determines tube-filling behavior and consumer mouthfeel |
| Density | Formula-specific range | Ensures correct fill weight per tube |
| Appearance | Uniform color, no streaks, no grit | Visual quality — first thing the customer notices |
| Fluoride assay | Within ±10% of label claim | Regulatory requirement in most markets |
| Microbial limits | <100 CFU/g (TAMC), no pathogens | Safety non-negotiable |
Only batches that pass all checks proceed to filling.
Step 6: Tube Filling & Sealing
Automated filling lines handle this at speeds of 80–200 tubes per minute. The process:
- Tube orientation: Empty tubes are fed into the line, oriented by their crimp position
- Filling: A piston filler dispenses the exact weight (e.g., 100g ± 1g) into each tube
- Crimp sealing: The open end is heat-sealed or folded + crimped, with batch code and expiry date embossed
- Cap placement: Flip-top, screw-cap, or stand-up caps are applied
- Weight check: Each tube passes over a checkweigher; under/overweight tubes are automatically rejected
What to look for: Automatic checkweigher rejection logs. A factory that tracks and analyzes rejection data is continuously improving. One that doesn’t is flying blind.
Step 7: Cartoning & Coding
Filled tubes move to the cartoning station:
- Each tube is inserted into its box (manual or automated)
- Box flaps are glued or tucked
- A thermal inkjet or laser coder prints batch number, manufacturing date, and expiry date on each box
- Optional: cellophane wrapping for tamper evidence
Step 8: Final QC & Laboratory Testing
Finished products undergo a final round of testing before release:
- Stability testing: Samples are stored at elevated temperatures (40°C / 75% RH) for 3 months accelerated aging, simulating 2-year shelf life
- Microbiological testing: Total aerobic microbial count, yeast & mold, specified pathogens
- Heavy metals: Lead, arsenic, mercury, cadmium — must be below regulatory limits
- Fluoride content: Confirmed within label claim tolerance
- Packaging integrity: Leak tests, seal strength, print adhesion
A complete Certificate of Analysis (COA) is issued for each batch.
Step 9: Packing & Shipping
Products are packed into master cartons (typically 24–72 units per carton), palletized, and prepared for shipment. Key considerations:
- FCL vs LCL: Full container load is more cost-effective for large orders
- Pallet configuration: Optimized to prevent crushing during transit
- Shipping documentation: Commercial invoice, packing list, bill of lading, certificate of origin
Why Manufacturing Quality Matters for Your Brand
Every step in this process affects your brand reputation:
- Poor mixing → gritty texture → one-star reviews
- Skipped vacuum deaeration → collapsed tubes → returns
- Inadequate stability testing → separated product on shelf → recall risk
- Weak QC → inconsistent fluoride levels → regulatory action
At LMS Oral, our 50,000 sqm facility runs fully automated production lines with inline quality monitoring at every stage. Our ISO 22716 GMP-certified process includes:
- Pharmaceutical-grade water purification
- Vacuum homogenization with automated viscosity control
- 3-stage QC: raw materials → in-process → finished product
- Accelerated stability testing for every new formulation
- Complete documentation package: SDS, COA, FSC, microbiological & heavy metal test reports
Contact our team to schedule a virtual factory tour and see our manufacturing process firsthand.
Keywords: toothpaste manufacturing process, how toothpaste is made, toothpaste production line, toothpaste factory process, toothpaste quality control
Interested in sourcing oral care products?
Contact us for a free consultation and quote.
Contact Us →